
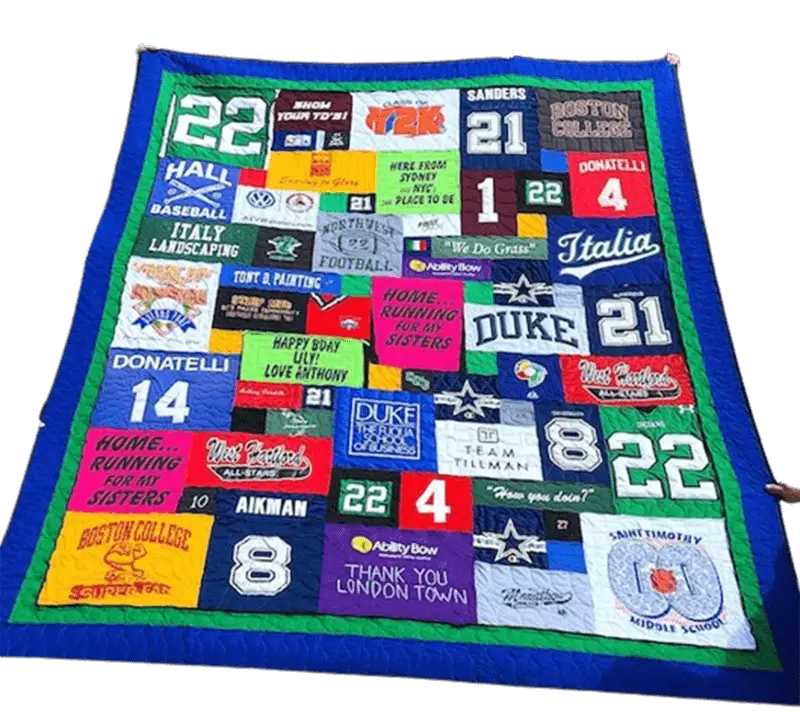
A T-Shirt quilt is a great way to preserve your memories and show off your style. They make great gifts, too! Here’s everything you need to know about putting one together.
T-shirts can be a fun and easy way to show your personality and have some extra impact at work or school. But they can also be a total pain in the neck to sew if you’re not familiar with the process. That’s why we created this step-by-step t-shirt tutorial where, you will learn how to make a quilt pattern—to help you take your project from start to finish, without any fuss, as well as tips for cutting and piecing your fabric. By the end, you’ll have all the information you need to make your own!
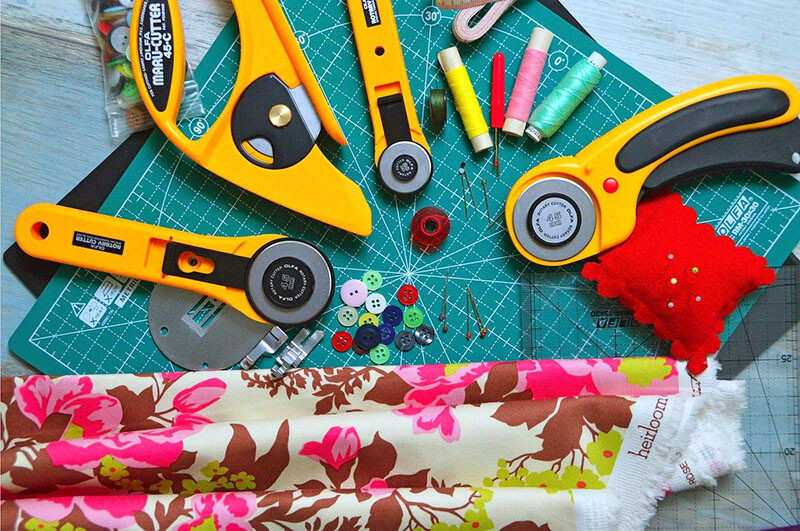
What You’ll Need to put a quilt together, let’s get started.
For a smaller quilt Size has 6 sides, a Twin Size has 24 sides, a Full size has 30 sides, a Large Throw has 36 sides, and a Queen Size has 42 sides.
-Rotary cutter and mat
-Clear ruler or straight edge
-Scissors to cut a piece of sashing strips
-Pins to hold sides together
-Sewing machine and thread to put them together
-Iron and ironing board to press your seam
-Backing fabric (we recommend a cotton blend)
-Batting (we recommend 100% cotton) and fleece for the backing
Step 1: Prep Your T-Shirts material
Start by washing all of your t-shirts in cold water and lay the quilt to dry. This will help to prevent them from shrinking when you wash the finished beautiful quilt. Once they’re dry, lay them out flat on a surface so you can see all of the designs. Decide which shirts you want to use and set aside the others.
Step 2: Cut the Shirts into Squares
Using a rotary cutter and clear ruler, cut the wrong side of t-shirts into squares or rectangle that are approximately 12”x12”. You don’t need to be exact, but try to make them as uniform in size as possible. If you have any shirts with particularly large designs. Once all of your shirts are cut into squares, set them aside.
Step 3: Cut the Backing Fabric and Batting
Learn how to make it by using the rotary cutter and clear ruler, cut your backing fabric into two pieces that are approximately 60”x60”. Set one piece aside for now—you’ll use it later. Cut your batting into two pieces that are also 60”x60”.
Step 4: Layer the Fabric
Now it’s time to start layering your fabric you’ve been saving! On a flat surface, lay down one piece of backing fabric right side up. Then, layer the batting on top of it—also right side up. Finally, top with the second piece of backing fabric, wrong side up. Use pins to secure all three layers together at each corner.
Step 5: Arrange the T-Shirt Squares
It’s time to start arranging your t-shirt squares on top of the backing fabric! Start in one corner and work your way out, creating rows together of squares until the entire quilt pattern is covered. As you arrange them, think about how you want the colors and patterns to interact with each other—you can create interesting effects by contrasting light and dark colors or by placing similar colors next to each other. Once you’re happy with the arrangement, use pins to secure the squares in place on top of the backing fabric.
Step 6: Sew Together the Rows
With all of the squares pinned in place, it’s time to start sewing! Using a sewing machine and thread that coordinates with your backing fabric, pin and sew each row of squares together along the outer edge. We recommend using a ½” seam allowance so that everything stays nice and secure. When you get to the end of each row, leave a long tail of thread so that you can easily connect it to another row later on. Repeat this process until all of your rows are sewn together—you should now have one long strip made up of all of your t-shirt squares! trim the excess around the outer edges of the blanket.
Step 7: Sew Together the Columns
Now it’s time to sew together your columns! Take two strips (rows) and line them up along one edge, wrong sides facing each other. Sew along this edge using a ½” seam allowance, then open up the strip so that both right sides are facing up again. Repeat this process until all of your strips are sewn together into one large quilt top! remember to leave a place your batting between the quilt top
Step 8: Trim Away Excess Fabric
Once all of your strips are sewn together, take a step back and take a look at your handiwork! If there are any areas where two pieces of fabric aren’t lining up perfectly or where there’s excess fabric sticking out beyond ¼” from either side, go ahead and trim it away now using scissors or a rotary cutter. This will help ensure nice clean lines when you finish sewing everything together later on.
Step 9: Finish Sewing Together
Now it’s time for the final assembly! Take your large quilt top and lay it down on top of one piece of batting—right sides facing each other—and pin in place around all four edges using plenty of pins (at least 10 per side). Then take both layers over to your sewing machine and sew around all four edges using a ½” seam allowance; be sure to backstitch at both ends for extra security
Quilting With Recycled Men’s Shirts
Men’s shirts are often overlooked as a source of fabric for quilting. But with a little creativity, they can be turned into beautiful and unique works.
Here are some tips for quilting with recycled men’s shirts:
1. Start by sorting through your shirts to find ones that are made of 100% cotton. These will be the easiest to work with.
2. Pre-wash all of your fabrics to avoid shrinkage later on.
3. Cut the shirts into usable pieces, such as squares, rectangles, or strips. You can also use a rotary cutter and cutting mat to make quick work of this step.
4. Once you have all of your pieces cut out, it’s time to start piecing them together like a puzzle. This is where you can get creative and make each tee unique.
5. Once you have your top pieced together, it’s time to add the wrong side of the t-shirt. This is usually made of cotton or polyester and gives the quilt extra warmth and insulation.
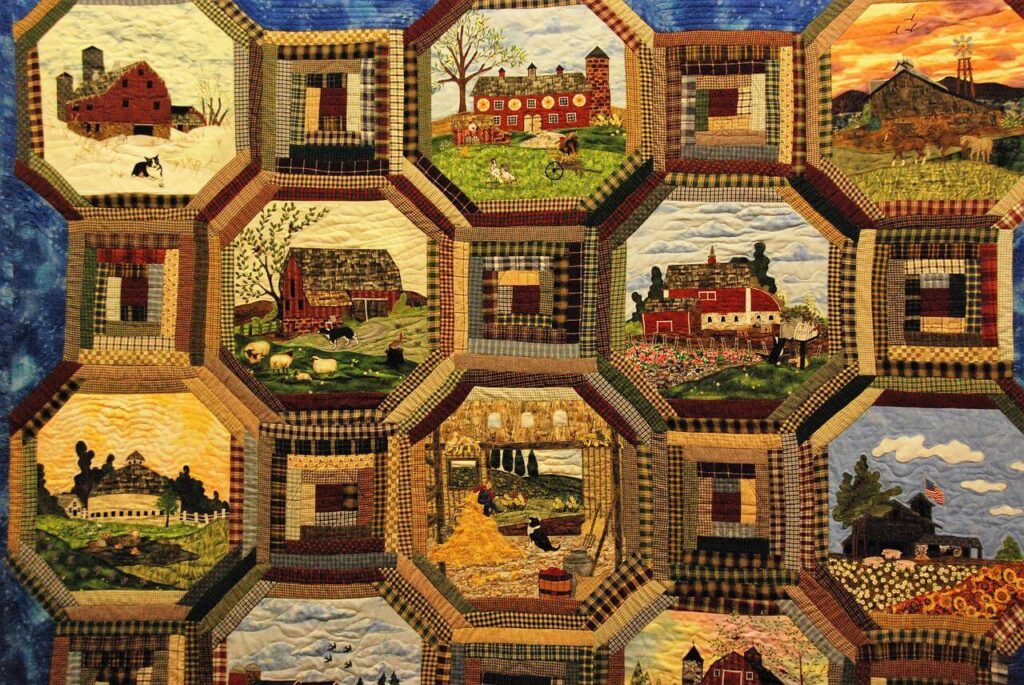
How to Rework a Tattered Quilt?
Although quilts can be expensive, many people have old ones that have been passed down through the family or purchased at yard sales. These are may be tattered and in need of repair, but they hold sentimental value. With a little time and effort, you can rework a tattered quilt into something new and beautiful.
First, assess its condition. Is it structurally sound? Are there any large holes or tears? If so, you will need to patch these areas before proceeding. Once the quilt is patched, take a close look at the fabric. Is it faded or worn? If so, you may want to consider piecing together new fabric to replace the damaged sections.
If the fabric is in good condition, but the quilt is simply old and worn, you can give it new life by adding a border. Choose a border fabric that complements the colors in the quilt top. Cut strips of fabric 2-3 inches wide and sew them around the perimeter to create a true masterpiece. You can also add embellishments such as beads or sequins to give your pattern a unique look.
Once you have repaired or enhanced the quilt top, it’s time to add batting and backing fabric. Batting gives a quilt its warmth and thickness, while backing provides stability and strength. Choose batting and t-shirt material blocks that are similar in weight so your finished product will lie flat when hung on a wall or used as a bedspread.
After layering the batting and sides of the shirt, use a wide stitch to attach them to the back of the quilt along all four sides. Be sure to leave several inches of excess fabric on each side so you can later bind the edges with bias tape or ribbon for a clean finish. Finally, wash your newly reworked quilt in cool water on a delicate cycle; this will help set the stitches and give your finished product a softer feel.
If you’re looking for a way to make t-shirts less stretchy and easier to work with, you may want to try fusible interfacing. Fusible interfacing is a fabric that can be ironed onto the back of fabrics to give them more stability. It’s often used in quilting and garment construction, but it can also be used on t-shirts.
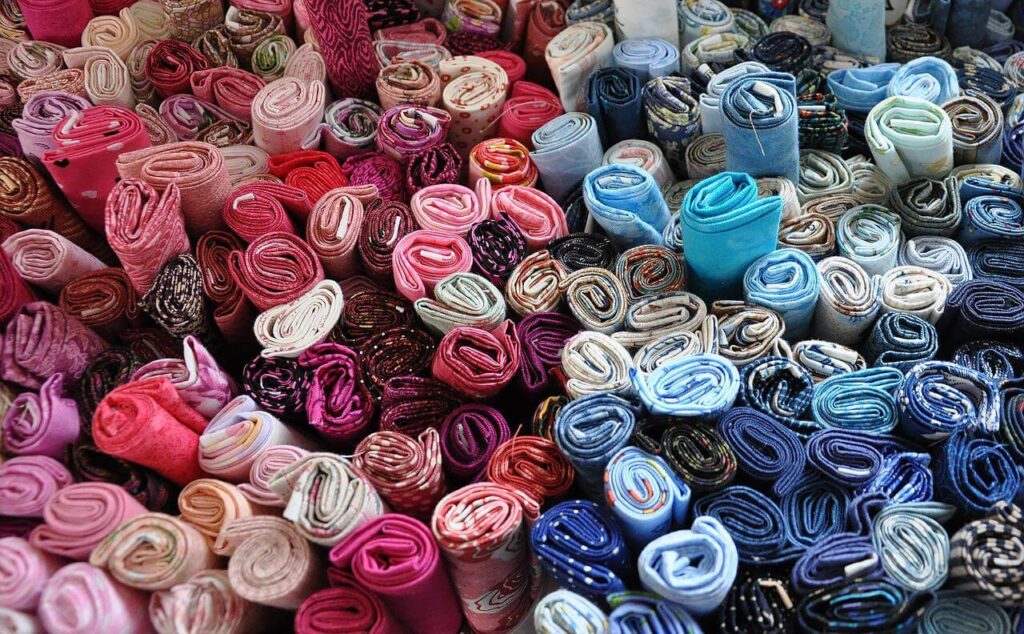
T-Shirt Quilting Supplies
When it comes to t-shirt quilting, the sky is the limit in terms of design and creativity. But in order to create a t-shirt quilt that will stand the test of time, you need to use high-quality materials and supplies. Here is a list of must-have supplies for t-shirt quilting, and here are some detailed instructions:
T-Shirts: Of course, you will need t-shirts! When selecting t-shirts for your quilt, choose shirts that are made from 100% cotton fabric. Avoid using shirts with logos or graphics on the front, as these can be difficult to work with. Instead, opt for solid colored or patterned shirts. You will need approximately 15-20 shirts for a twin size. How much additional fabric will you need to fill in the space between the t-shirts to make your desired size?
Fabric Scissors: A sharp pair of fabric scissors is a must for any sewing project, but it is especially important when cutting out t-shirt squares. Choose a pair of scissors that feels comfortable in your hand and that cuts through fabric easily.
Rotary Cutter and Mat: It will make cutting out your t-shirt squares a breeze! If you don’t have one, you can also use a ruler and sharp fabric scissors to cut out your squares. Just be sure to cut slowly and carefully so that your squares are all even in size.
Iron and Ironing Board: You will need to press your t-shirt squares before sewing them together, so an iron and ironing board are essential supplies. If you don’t have an ironing board, you can use a towel or pillowcase laid flat on a table or other hard surfaces.
Sewing Machine: A sewing machine is not strictly necessary, but would be appreciated, but it will make the process go much faster. If you don’t have access to a sewing machine, you can hand stitch your quilt together using a needle and thread.
Are you going to quilt it yourself or send it out to a professional long-arm quilter?
If you are new to quilting, or simply don’t have the time to do it yourself, then sending it out to a professional long-arm quilter may be the best option for you. Long-arm quilters have years of experience and can get the job done quickly and efficiently. Plus, they have access to specialized equipment that can make yours look its best.
On the other hand, if you enjoy quilting or want to save money, then doing it yourself may be the way to go. Quilting is a relaxing and therapeutic activity that can be very satisfying. And, with today’s technology, there are plenty of resources available to help you get started and achieve great results.
Do you Have any other tips and hints when using them in quilts?
What type of batting material should be used?
There are many different types of batting materials available on the market, so it can be difficult to know which one is right for you. Here is a breakdown of the most popular types of batting, to help you make an informed decision.
Polyester Batting: Polyester batting is a man-made fiber that is strong and durable. It is less likely to stretch or shrink than other fibers, and it will hold its shape well over time. Polyester batting is also hypoallergenic, making it a good choice for those with allergies or sensitivities.
Cotton Batting: Cotton batting is made from natural fibers, making it breathable and comfortable. It has a bit more give than polyester batting, so it may be a good choice if you plan to quilt your project by hand. Cotton batting can also be pre-washed before use, to prevent shrinkage later on.
Wool Batting: Wool batting is made from natural fibers, and it provides insulation and warmth. It can also be pre-washed before use. However, wool batting may stretch or shrink more than other types of batting, so it is important to test a small sample before using it in your project.
How to Sew Big Quilts on a Small Machine?
Sewing big quilts on a small machine can be challenging, but it is possible with the right techniques. Here are a few tips to help you sew big quilts on a small machine:
1. Use a walking foot. A walking foot helps to evenly feed the fabric through the machine, which is especially helpful when sewing large quilts.
2. Take your time. When sewing large quilts, it is important to take your time and sew slowly. This will help to prevent mistakes and ensure that your stitches are even and strong.
3. Use extra-long basting pins. Basting pins are used to hold fabric in place while you sew, and they come in various lengths. When sewing large quilts, use extra-long basting pins so that you can easily pin through multiple layers of fabric.
4. Layer your fabrics wisely. When layering fabrics for a large quilt, it is important to consider how each layer will affect the overall finished product. For example, heavier fabrics should be placed closer to the bottom so that they don’t weigh down the quilt top and cause it to sag or stretch out of shape.

How to Make a T-Shirt Memory Quilt?
A memory quilt made from t-shirts is a unique and personal way to keep your memories alive. These are easy to make and can be customized to your liking. You can use t-shirts for special events, vacations, sports teams, or any other significant moments in your life. It is a fun project that you can do with friends or family.
How to Make Quilted Coasters?
For many people, quilting is a way to relax and unwind. It’s a chance to take some time for yourself and create something beautiful. Quilted coasters are a great project for beginners or experienced quilters alike. They’re quick to make, and you can use up scraps of fabric that you might otherwise throw away. Plus, they make great gifts!
If you’ve never quilted before, don’t worry. It’s not as difficult as it looks. The key is to take your time and be patient. With a little practice, you’ll be able to create beautiful quilted coasters that will impress your friends and family.
To get started, you’ll need the following supplies:
-fabric scraps in various colors and patterns (you can use old clothes or material from a hobby store)
First, decide what size you want your coasters to be. They can be any size you like, but 4 inches square is a good place to start. Once you know the size of your coaster, cut out fabric squares that are slightly larger than the finished size of your coaster. For example, if you want your coaster to be 4 inches square when finished, cut your fabric squares 4 1/2 inches square. You will need four fabric squares for each coaster you make.
How to Use Batiks in Quilts?
Batiks are a beautiful fabric that can be used in many different ways in quilts. They add color and interest to any quilt and can be used in a variety of ways to create different looks.
One way to use batik fabrics is to create a pieced blocks together. This can be done by cutting the fabric into strips or squares and then sewing them together into a design. You can also use batik fabrics to create applique designs on your yardage. Simply cut out the shapes you want and then sew them onto the background fabric.
Another way to use batik fabrics is to create a whole cloth quilt. This is created by stitching the fabric directly onto the backing material. You can then add batting and quilt it as you would any other quilt. Whole cloth quilts are often decorated with embroidery or other embellishments after they are completed.
Batiks make beautiful, one-of-a-kind quilts that will be cherished for years to come. Experiment with different techniques and looks to find what you like best!
Quilting With Recycled Men’s Shirts
To get started, gather up any old men’s shirts that you have (or hit the thrift store for some cheap finds). You will also need some cotton batting and quilt backing fabric. Once you have your materials gathered, it’s time to start cutting out your shirt pieces. For this project, you will want to cut the shirt into squares or rectangles. You can make your pieces as big or small as you like, just be sure to leave enough seam allowance around each piece.
Once all of your pieces are cut out, it’s time to start sewing them together. You can sew your pieces together by hand or machine, whichever is easiest for you. When sewing the pieces together, be sure to alternate the pattern and colors so that your finished quilt looks nice and cohesive. Once all of your pieces are sewn together, it’s time to add the batting and backing fabric. Again, stitch these layers together by hand or machine – whatever is easiest for you.
And that’s it! Your recycled men’s shirt quilt is now complete! This project is perfect for beginners since it doesn’t require any fancy techniques or materials. And once you finish this project, you’ll have a beautiful new quilt that will keep you warm all winter long – not to mention it will be extra special because it was made with love (and recycled materials!).
How to Start a Quilt Guild
A quilt guild is a great way to meet other quilters, learn new techniques, and get involved in the quilting community. Here are some tips on how to start one:
1. Choose a name for your guild and register it with your state or province.
2. Draft bylaws to govern the operations of your guild. Include provisions for membership, meetings, officers, and committees.
3. Recruit members! Use social media, word-of-mouth, and local advertising to spread the word about your new guild.
4. Schedule regular meetings and events. Some popular topics for meetings include guest speakers, demonstrations, workshops, and charity projects.
5. Appoint officers to handle the day-to-day operations of the guild. Common positions include president, vice president, treasurer, secretary, and program chairperson.
6. Start planning exciting events! Popular events include quilt shows, retreats, bus trips to visit other guilds or quilt shops/museums
First of all I want to say excellent blog! I had a quick question which I’d like to
ask if you don’t mind. I was interested to know how you center yourself and clear your mind before writing.
I’ve had trouble clearing my mind in getting my ideas out.
I do enjoy writing but it just seems like the first 10 to 15 minutes are lost simply just trying to figure out how to begin. Any
ideas or hints? Many thanks!