
How to fold fabric for cutting
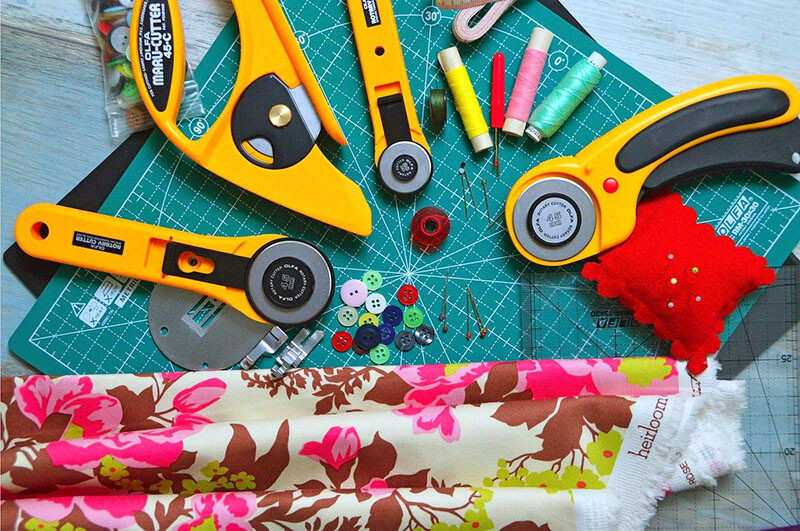
First, you will need to gather your supplies. You will need a rotary cutter, a cutting mat, and a ruler. It is also helpful to have a strip of fabric that is at least 6″ wide.
Next, you will need to fold your fabric. Fold the fabric in half, lengthwise, with the wrong side facing out. Then, fold the fabric in half again. You should now have a strip of fabric that is about 4″ wide.
Cut the strips. Using a rotary cutter into 4″ squares. You can also use a rotary cutter to slice the strips into smaller pieces if you want to. Once you have cut the strips, you will need to trim them so that they are about 3″ wide.
Now, you are ready to start cutting your quilt squares. To do this, you will need to mark the fabric. First, you will need to find the selvages. The selvages are the edges of the fabric that have been finished by the manufacturer. Once you have found the selvages, you will need to mark a horizontal line on the fabric, about 1″ from the selvage. This line will be used as a guide for cutting the quilt squares.
Now, you will need to cut the quilt squares. To do this, you will need to use a rotary cutter. First, you will need to find the horizontal line that you marked on the fabric. Then, you will need to align the edge of the rotary cutter with the line. Next, you will need to hold the rotary cutter away from your body and slice the fabric. Be sure to cut along the fold of the fabric, so that you do not cut off any of the selvages.
Once you have cut the quilt squares, you are ready to start sewing your quilt.
Technique for cutting large pieces of fabric
There are a few things to keep in mind when cutting large pieces of fabric. First, use a sharp pair of scissors. Second, make sure the fabric is lying flat on a surface before cutting. Third, measure and mark the fabric before cutting to avoid mistakes. Finally, cut slowly and carefully to get a clean edge.
How to prepare fabric for cutting
To prepare fabric for cutting, first, wash and press the fabric to remove any wrinkles. Then use a rotary cutter or scissors to cut the fabric into the desired vertical and horizontal shape.
Rotary Cutting Fabric – The Right Way
There’s a right way and a wrong way to rotary cut fabric. Experienced quilters use a sharp rotary cutter, a self-healing cutting mat, and a clear ruler. The wrong way is to use a dull rotary cutter, a damaged cutting mat, or no ruler at all.
When you rotary cut fabric the right way, you’ll end up with clean, straight cuts that are easy to sew along the bottom. When you cut the fabric the wrong way, you’ll end up with frayed edges, crooked cuts, and a lot of wasted fabric.
So if you want to make sure your next sewing project turns out looking professional, take the time to cut long strips of fabric on a perpendicular line on the mat. Cut a small piece first. It is important to always cut the fabric along away from your body.
Cutting quilt squares with scissors
Cutting quilt squares with scissors can be a bit tricky, but it’s definitely doable! Just be sure to use a sharp pair of scissors and take your time. Cutting along the lines slowly and carefully will help you get nice, clean cuts. And if you need to, you can always use a ruler or other straight edge to help guide your scissors.
How do you cut fabric into perfect squares?
To cut fabric into perfect squares, you will need a sharp pair of scissors and measuring long ruler tape. First, measure out the desired size of your square on the fabric and mark it with a pencil. Then, cut along the marked lines with your scissors to create your perfect square.
4 Essential tips for cutting fabric for your quilt
When cutting fabric for your quilt, there are a few essential tips to keep in mind. First, be sure to use a rotary cutter and cutting mat for precise cuts. Second, use a clear acrylic ruler to ensure straight cuts. Third, when cutting strips, be sure to stack the fabric neatly and cut all layers at once. Fourth, when cutting curves, use a template and take your time to ensure accurate cuts. By following these tips, you’ll be able to cut fabric for your quilt quickly and easily.
Should quilt borders be cut crosswise or lengthwise?
There is no definitive answer to this question as it depends on personal preference. Some quilters prefer to cut their borders crosswise, while others find it easier to cut them lengthwise. Ultimately, it is up to the individual quilter to decide which method works best for them.
Measure Twice, Cut Once: A Tutorial on How to Cut Fabric for Quilting
This tutorial will show you how to cut fabric for quilting. First, you will need to gather your supplies. You will need a rotary cutter, a cutting mat, and a straight edge. You will also need fabric scissors and a ruler.
Next, you will need to measure your fabric. Measure the width and length of the fabric, and then add 1/2 inch to each measurement. This extra 1/2 inch is for the seam allowance.
Once you have measured your fabric, it is time to cut it. Place the fabric on the cutting mat, and use the straight edge and rotary cutter to cut along the lines you have drawn. Be sure to use a sharp blade in your rotary cutter, and be careful not to cut yourself!
After you have cut your fabric, you are ready to start sewing!
What is the easiest way to cut quilt squares?
There are a few different ways to cut quilt squares, but the easiest way is to use a rotary cutter and a cutting mat. First, measure and mark the fabric where you want to cut the squares. Then, line up the rotary cutter with the marked lines and cut along them. If you’re not using a cutting mat, be careful not to cut yourself on the blade.
Cutting Fabric for Quilt Blocks with the Cricut Maker
Cutting straight fabric for quilt blocks with the Cricut Maker is a quick and easy process. Simply select the fabric you want to use, choose the quilt block design you want to accurately cut, and then send the design to the Cricut Maker. The machine will do all the work for you, cutting the fabric into perfect quilt blocks.
Cutting Segments from Strips
Cutting segments from strips can be a useful way to create interesting shapes and patterns. By cutting small segments and then reassembling the strips, you can create all sorts of new designs. This can be a great way to add interest to your work, and it’s also a good way to use up scraps of fabric that you might otherwise throw away.